In this guide, we'll walk through configuring a KVM (Kernel-based Virtual Machine) on a Fedora host to run a Windows 11 guest instance. This setup ensures that Windows continues to boot and function properly, even after installation and multiple reboots.
I prefer using Fedora Linux as my primary desktop and development environment. However, there are times when I need to run Windows; whether it's to test software compatibility on the Edge browser, try out a Windows-only application, or use niche tools like the Bose firmware upgrader that require a Windows operating system. In these cases, running a Windows virtual machine (VM) is far more convenient than dual-booting, as it allows me to switch between Linux and Windows seamlessly without restarting my PC.
One of the key challenges when running Windows 11 in a virtual machine on Linux is configuring the firmware and TPM module to ensure compatibility with Windows 11 requirements.
Why a TPM is Important for Running Windows 11
Windows 11 has specific requirements that include the presence of a Trusted Platform Module (TPM) version 2.0. While it is possible to install Windows 11 without a TPM or with a misconfigured TPM, you may encounter issues after a few reboots, such as the system booting into recovery mode. The TPM provides key security features, including hardware-based key storage, secure boot, and protection against firmware-level attacks.
If you're running Windows 11 in a virtual machine, it's highly recommended to configure a virtual TPM (vTPM). This emulates the TPM functionality in a virtual environment, ensuring your VM benefits from the same security features as a physical Windows machine. Disabling or bypassing the TPM requirement is technically possible but not advisable due to the increased vulnerability to attacks.
Why a Virtual TPM (vTPM) Matters
Without a TPM (or vTPM), VMs are more vulnerable, especially if the hypervisor or host system is compromised. They lack the hardware-based security features that a physical TPM provides, such as encrypted key storage, secure boot validation, and enhanced protection against firmware-level threats.
On the other hand, configuring a vTPM in your VM setup allows you to achieve similar security levels as physical systems. It ensures your Windows 11 guest instance can securely manage encryption keys, validate the boot process, and protect sensitive data, even within a virtualized environment.
Summary
By configuring your KVM environment with a vTPM on Fedora, you can run Windows 11 securely and without the common boot issues that arise when TPM requirements aren't met. This setup allows you to test Windows software or work with Windows-only tools while still having access to your Linux development environment.
Instructions
Ensure virtualization is supported
if grep-E'vmx|svm' /proc/cpuinfo;then
echo-e"\e[32mOK\e[0m"# Green color for OKelse
echo-e"\e[31mUnsupported\e[0m"# Red color for Unsupportedfi
The simplest way to complete this task is to use virt-manager to create a new VM through the graphical user interface. Follow these
steps.
ℹ
Note: Cockpit Virtual Machines does not appear to support changing the firmware of a VM.
start virt-manager
sudo virt-manager
Create new VM select File → New Virtual Machine.
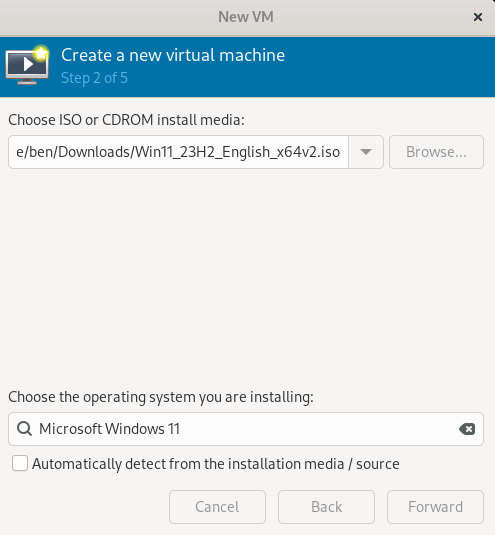
Select installation source. I will use a downloaded ISO image.
ℹ
Note: Windows ISO's are available from the Windows website here
Download Windows 11
Choose install media and choose operating system. Choose the ISO file for Windows 11 as your install media, then uncheck "Automatically detect" and set the OS variant as 'Windows 11' in the dropdown.
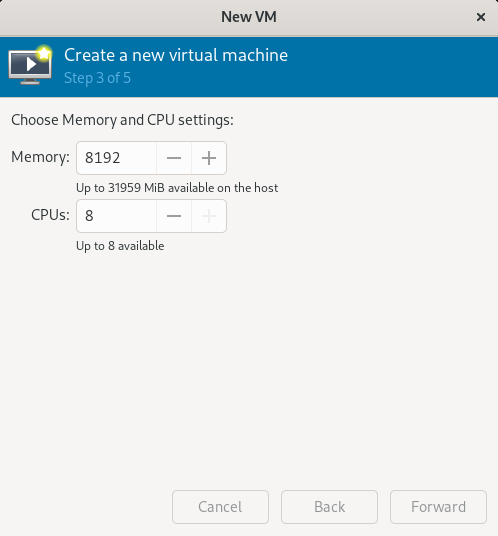
Choose the Memory and CPU parameters of your preference. For a smooth Windows 11 experience, allocate at least 8 GB of RAM and
4 CPU cores. Adjust based on your system’s resources.
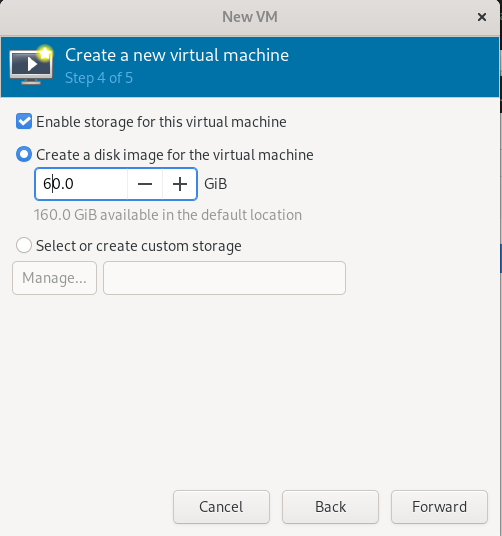
Choose storage configuration
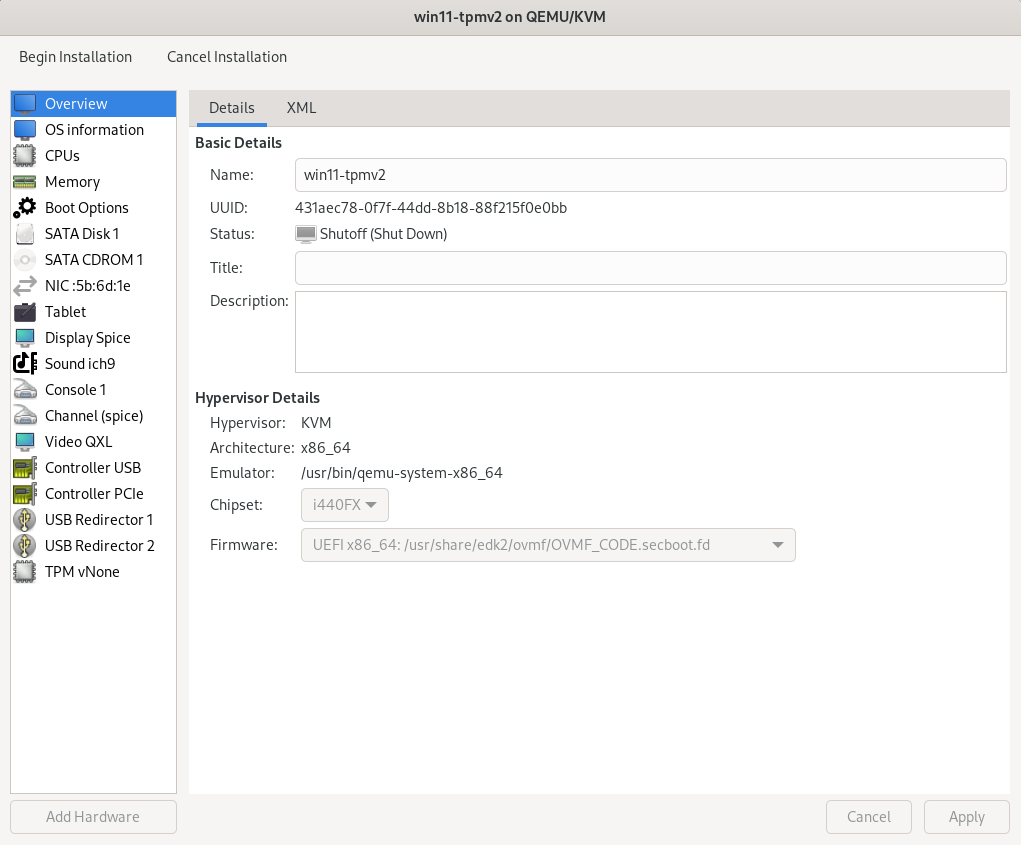
Important: Before proceeding, ensure you check the 'Customize configuration before install' box. This allows you to adjust the chipset,
firmware, and add a vTPM, which are required for Windows 11
Important: In the 'Overview' section, set the firmware to OVMF_CODE.secboot.fd for UEFI and Secure Boot support. Under 'Chipset,'
choose i440FX for compatibility with Secure Boot features
Chipset: i440FX
Firmware: OVMF_CODE.secboot.fd
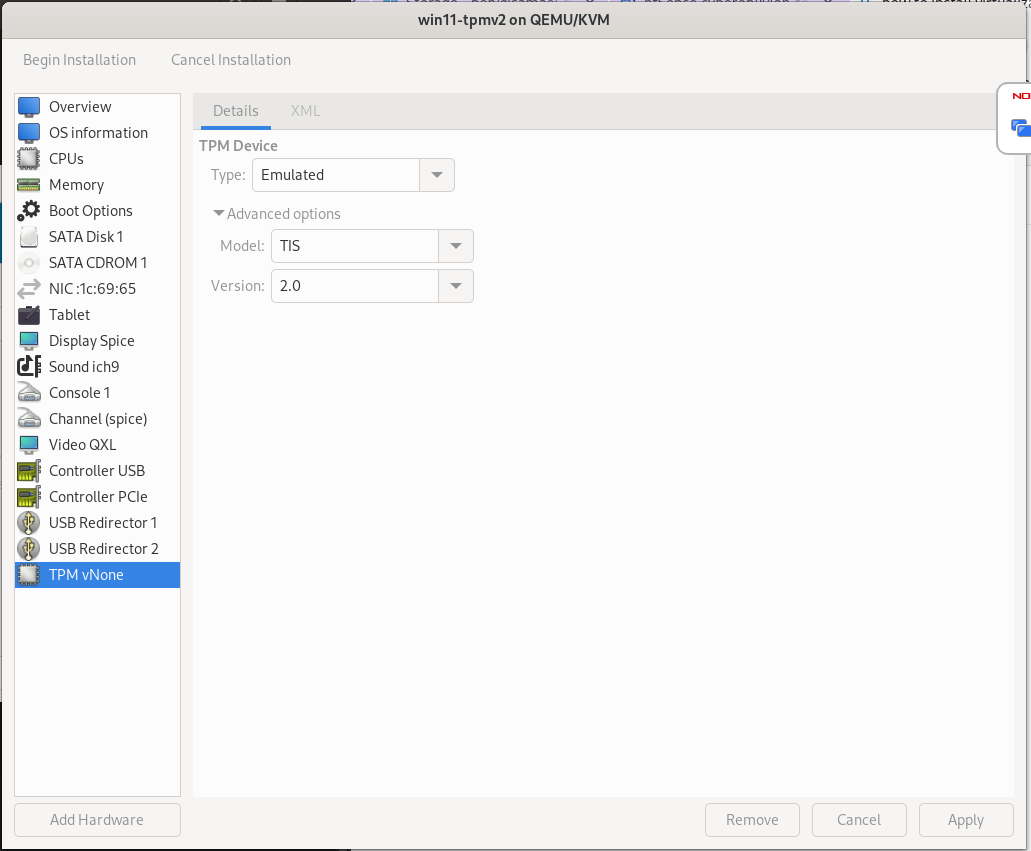
Important: Ensure vTPM is configured for Windows 11 compatibility.
Update the firmware version, and add a vTPM, which are required for Windows 11
Model: TIS
version: 2.0
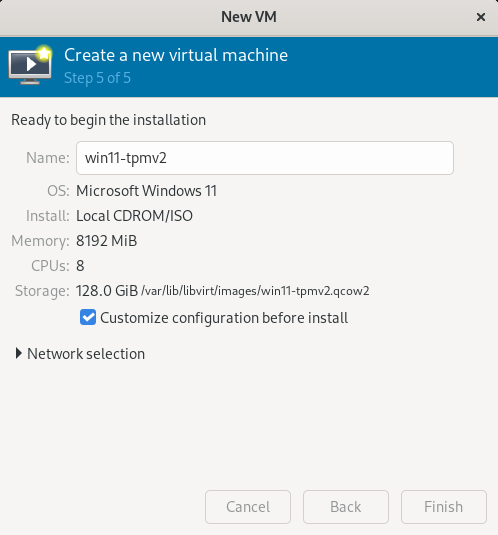
Once the configuration is complete, select 'Begin Installation.' After installation, ensure you install any necessary drivers or tools such as
the VirtIO drivers for improved VM performance. The latest Windows VirtIO binary drivers are available here courtesy of Fedora!:
Download VirtIO binary drivers
ℹ
Note:
Alternatively from the command line run this command.
you must update the windows ISO location and network configuration to match your environment
Download Windows 11