Linux Development on Windows with WSL 2
Remember when developing on Windows meant choosing between clunky virtual machines, dual booting, or just accepting that some tools wouldn’t work properly? Those days are over. Windows Subsystem for Linux 2 (WSL 2) brings real Linux to Windows, and it’s a game changer.
This guide walks through setting up a production-ready Linux development environment on Windows 11, including Amazon Linux 2023, systemd configuration, and VS Code integration that doesn’t suck.
Back to the HACKS!
What is WSL 2 and Why Should You Care?
WSL 2 isn’t just “Linux on Windows.” It’s a full Linux kernel running in a lightweight virtual machine that integrates seamlessly with Windows. You get:
- Real Linux performance - No more slow file operations or weird compatibility issues
- Native Unix tooling - bash, ssh, git, podman, everything works as expected
- Seamless integration - Access Windows files from Linux and vice versa
- Multiple distros - Run Ubuntu, Debian, Amazon Linux, or any distribution simultaneously
- Development-ready - Perfect for Claude Code and other tools that run better in Linux
Think of it as having a Linux workstation that lives inside your Windows machine, accessible instantly from any terminal.
Prerequisites
Before we start, make sure you have:
- Windows 11 (or Windows 10 version 2004 or higher)
- WSL 2 installed - If you haven’t installed WSL yet, open PowerShell as Administrator and run:
wsl --install - Administrator access - Some steps require elevated privileges
To verify you’re running WSL 2 (not version 1), open PowerShell and run:
wsl --list --verbose
Look for “VERSION 2” next to your distributions. If you see “VERSION 1”, upgrade with:
wsl --set-version <distro-name> 2
Quick Install: Popular Distributions from Microsoft Store
The easiest way to install popular distributions is directly from the Microsoft Store or command line:
From PowerShell:
# Ubuntu (most popular)
wsl --install -d Ubuntu

# Debian
wsl --install -d Debian

# Fedora
wsl --install -d Fedora

# See all available distributions
wsl --list --online
From Microsoft Store:
- Ubuntu
- Debian
- Fedora - Now available as a standard install! My personal favorite and beloved distro for its cutting-edge packages, excellent developer experience, and rock-solid stability.
- Kali Linux
- openSUSE
These install with a single click and come pre-configured. However, for distributions not in the Store (like Amazon Linux or Rocky Linux), use the manual import process below.
Installing Amazon Linux 2023 on WSL 2
While Ubuntu is the default WSL distribution, Amazon Linux 2023 is excellent for developers working with AWS or wanting an enterprise-focused distribution. For distributions not available in the Microsoft Store (like Amazon Linux or Rocky Linux), you can use the manual import process we’ll cover below.
Here’s how to install Amazon Linux 2023:
Step 1: Download the Amazon Linux Container
Download the Amazon Linux 2023 container tarball from AWS:
Amazon Linux 2023 Container Image
Save it somewhere accessible, like C:\WSL\.
Step 2: Create a Directory for Your Instance
Create a directory to hold the WSL instance filesystem:
mkdir C:\WSL\AL2023
Step 3: Import the Instance
Import the tarball as a new WSL instance:
wsl --import al2023 C:\WSL\AL2023 C:\WSL\al2023-container-2023.6.20241212.0-x86_64.tar.xz
Command breakdown:
al2023- The name of your WSL instanceC:\WSL\AL2023- Directory where the filesystem will be storedC:\WSL\al2023-container-...tar.xz- Path to the downloaded tarball
al2023) and directory name (AL2023) match? This keeps things simple. When you run wsl -d al2023, you know exactly where its files live: C:\WSL\AL2023. No mental gymnastics trying to remember which directory holds which instance. This convention saves confusion when managing multiple WSL distributions.
Step 4: Start the Instance
Launch your new Amazon Linux instance:
wsl -d al2023
You’ll see error messages about missing packages. This is expected; the container image is minimal by design.
Installing Essential Packages
The base Amazon Linux container is bare bones. Let’s install the tools you need for development:
dnf -y install util-linux sudo passwd vi vim make gcc g++ git wget tar procps \
rsync iputils net-tools amazon-ec2-net-utils policycoreutils policycoreutils-python-utils \
selinux-policy-targeted setools bind-utils rpm-build rpmdevtools ncurses-devel libcurl-devel \
openssl openssh-server openssl-devel unixODBC unixODBC-devel firewalld
What we’re installing:
- Basic utilities:
util-linux,passwd,vim,tar,procps - Development tools:
gcc,g++,make,git,ncurses-devel - Network tools:
iputils,net-tools,openssh-server - Security tools:
policycoreutils,selinux-policy-targeted,firewalld - Build tools:
rpm-build,rpmdevtools
After installation completes, restart the instance:
wsl --terminate al2023
wsl -d al2023
Enabling systemd (For Testing Environments)
Most of the time, you won’t need systemd for development work. However, if you’re setting up a testing or staging environment where you need to run services and daemons (like SSH servers, Podman containers as services, or databases managed by systemd), here’s how to enable it:
Install systemd
sudo dnf install systemd
Configure WSL to Use systemd
Create or edit /etc/wsl.conf:
sudo vim /etc/wsl.conf
Add the following:
[boot]
systemd=true
Restart the Instance
wsl --terminate al2023
wsl -d al2023
When you reattach, systemd will be running. Verify with:
systemctl status
Creating a Non-Root User
Running as root is bad practice. Let’s create a proper user account:
Add a New User
sudo useradd -m -d /home/ben -G wheel ben
Replace ben with your desired username. The -G wheel flag adds the user to the admin group.
Set a Password
sudo passwd ben
Configure WSL to Use Your User by Default
Edit /etc/wsl.conf:
sudo vim /etc/wsl.conf
Add or update the [user] section:
[user]
default = ben
Optional: Enable Passwordless sudo
For convenience (use with caution), you can allow your user to run sudo without a password:
sudo visudo
Find the line:
%wheel ALL=(ALL) ALL
Change it to:
%wheel ALL=(ALL) NOPASSWD: ALL
Save and exit. Restart the instance:
wsl --terminate al2023
wsl -d al2023
You should now log in as your user automatically.
Disabling Automatic /etc/hosts Generation
By default, WSL regenerates /etc/hosts on every restart, which can be annoying if you’ve made custom entries. To disable this:
Edit /etc/wsl.conf:
sudo vim /etc/wsl.conf
Add the following:
[network]
generateHosts = false
Restart the instance:
wsl --terminate al2023
wsl -d al2023
Your /etc/hosts file will now persist across restarts.
Developing with VS Code in WSL 2
VS Code has excellent WSL integration, but there are some crucial best practices to follow for optimal performance.
The Right Way: Install VS Code on Windows
DO THIS:
- Install VS Code directly on Windows (not in WSL)
- Use the
codecommand from your WSL terminal to launch VS Code - Install the “Remote - WSL” extension in VS Code
Example:
# From inside WSL
cd ~/dev/projects/my-project
code .
This opens VS Code on Windows with your WSL files mounted properly.
The Wrong Way: Avoid Windows-Mounted Directories
DO NOT DO THIS:
- Don’t develop in
/mnt/c/Users/yourname/projects - Don’t access Windows directories from WSL for active development
- Don’t clone git repos into Windows and edit them from WSL
Why? File operations across the Windows/Linux boundary are dramatically slower. Every file read/write has to be translated between filesystems, which kills performance.
Instead:
- Clone and work on projects directly in WSL’s filesystem:
~/dev/projects/ - Use the exact directory structure from our development environment guide
- Access your projects via VS Code’s WSL integration
Performance Comparison
Here’s the reality:
| Operation | Windows Mount (/mnt/c) |
WSL Filesystem (~) |
|---|---|---|
npm install |
2-5 minutes | 30 seconds |
| Git operations | Painfully slow | Native speed |
| File watching | Unreliable | Works perfectly |
| Build times | 3-4x slower | Full speed |
The difference is massive. Always work in WSL’s native filesystem.
Setting Up VS Code
-
Install VS Code on Windows from code.visualstudio.com
- Install the Remote - WSL extension:
- Open VS Code
- Go to Extensions (Ctrl+Shift+X)
- Search for “Remote - WSL”
- Click Install
- Open your project from WSL:
cd ~/dev/projects/my-project
code .
VS Code will connect to your WSL instance automatically and you’ll get full IntelliSense, debugging, and terminal integration.
Installing Claude Code in WSL
Claude Code is an AI-powered coding assistant that works exceptionally well in WSL environments. Here’s how to set it up:
Install Claude Code in WSL
From your WSL terminal, run the installation script:
curl -fsSL https://claude.ai/install.sh | sh
This installs Claude Code in your WSL instance, giving it native access to your Linux filesystem and tools.
Verify the Installation
claude --version
You should see the Claude Code version number, confirming it’s installed correctly.
Install the Claude Code VS Code Extension
To integrate Claude Code with VS Code:
-
Open VS Code (already configured for WSL from above)
- Install the Claude Code extension:
- Open Extensions (Ctrl+Shift+X)
- Search for “Claude Code”
- Click Install
- Make sure it installs in WSL (you’ll see “Install in WSL: Ubuntu” or similar)
- Authenticate Claude Code:
- Click the Claude icon in the VS Code sidebar
- Follow the authentication prompts
- Or run from terminal:
claude auth login
Once connected, you’ll see the Claude Code interface in VS Code’s sidebar, ready to assist with code generation, debugging, and analysis—all running natively in your WSL environment.
Using Claude Code in WSL
Once installed, Claude Code can:
# Generate code from natural language
claude "create a bash script to backup ~/dev to ~/backups"

# Analyze and improve existing code
claude "review this function for security issues" < script.py

# Debug issues
claude "why isn't this working?" < broken-script.sh

# From VS Code
# Use Ctrl+L (or Cmd+L on Mac) to open Claude Code chat
# Highlight code and ask Claude for help, refactoring, or explanations
Why WSL makes Claude Code better:
- Faster file operations - Claude can read and analyze your codebase quickly
- Native toolchain access - Claude can run tests, build tools, and linters directly
- Better shell integration - Commands and scripts work as expected in Linux
- Full Unix tooling - Access to grep, sed, awk, and all standard Linux utilities
- No path translation issues - Everything just works without Windows/Linux path conversions
~/dev/projects) rather than Windows mounts (/mnt/c). Keep your projects in WSL for the best experience.
Complete /etc/wsl.conf Reference
Here’s a complete /etc/wsl.conf with all the settings we’ve configured:
[boot]
systemd=true

[user]
default = ben

[network]
generateHosts = false
You can add additional settings as needed. Check the official WSL configuration documentation for more options.
Configuring WSL 2 Resource Limits with .wslconfig
By default, WSL 2 can use up to 50% of your total system memory and all available CPU cores. If you’re running resource-intensive workloads or want more control over WSL’s resource allocation, you can configure limits using .wslconfig.
Creating .wslconfig
Create or edit C:\Users\YourName\.wslconfig in Windows (not in WSL):
From PowerShell:
notepad $env:USERPROFILE\.wslconfig
Or from WSL:
notepad.exe /mnt/c/Users/YourName/.wslconfig
Example .wslconfig Configuration
[wsl2]
# Limit memory to 8GB (adjust based on your needs)
memory=8GB

# Limit CPU cores to 4
processors=4

# Set swap size to 2GB
swap=2GB

# Disable swap file (optional, for maximum performance)
# swap=0

# How much swap space to allocate (percentage of memory)
swapfile=%USERPROFILE%\\AppData\\Local\\Temp\\swap.vhdx

# Enable localhost forwarding (allows accessing WSL services from Windows)
localhostForwarding=true
Understanding the Settings
Memory Limits:
memory=8GB- Caps WSL 2 at 8GB of RAM- Useful if you run Windows applications alongside WSL
- Default is 50% of total RAM or 8GB, whichever is less
CPU Limits:
processors=4- Limits WSL to 4 CPU cores- Useful for preventing WSL from monopolizing CPU during builds
- Default is all available processors
Swap Configuration:
swap=2GB- Sets swap file sizeswap=0- Disables swap entirely (better performance but higher memory pressure)- Default is 25% of memory size
When to Adjust These Settings:
- Heavy builds - Increase memory and processors for faster compilation
- Resource constraints - Limit WSL if you need RAM/CPU for Windows applications
- Multiple WSL instances - Reduce limits if running several distributions simultaneously
- Performance tuning - Disable swap for maximum speed (ensure adequate RAM)
Apply the Changes
After editing .wslconfig, restart WSL completely:
wsl --shutdown
wsl -d al2023
Your new resource limits will take effect immediately.
.wslconfig file applies globally to ALL WSL 2 distributions on your system. If you run multiple distros simultaneously, they share these resource limits. Per-instance configuration is done via /etc/wsl.conf inside each distribution.
Bringing Your Linux Dev Environment to WSL
Remember the development environment setup we covered? It works perfectly in WSL. Here’s how to migrate:
1. Create Your Directory Structure
mkdir -p ~/dev/projects ~/dev/utils
2. Copy Your Dotfiles
If you have dotfiles on another Linux machine:
# From your Linux machine
scp ~/.bashrc ~/.gitconfig youruser@yourwindowspc:/tmp/

# From WSL
cp /mnt/c/Users/YourName/Downloads/.bashrc ~/
cp /mnt/c/Users/YourName/Downloads/.gitconfig ~/
Or just recreate them following the guide.
3. Install Development Tools
# Git (already installed above)
# Node.js
curl -fsSL https://rpm.nodesource.com/setup_20.x | sudo bash -
sudo dnf install nodejs

# Python
sudo dnf install python3 python3-pip

# Podman (rootless container management)
sudo dnf install podman

# Optional: Set up Podman socket for Docker compatibility
systemctl --user enable --now podman.socket
4. Clone Your Projects
cd ~/dev/projects
git clone git@github.com:yourname/your-project.git
You’re now running the same environment across Windows (via WSL), Linux VMs, and cloud instances.
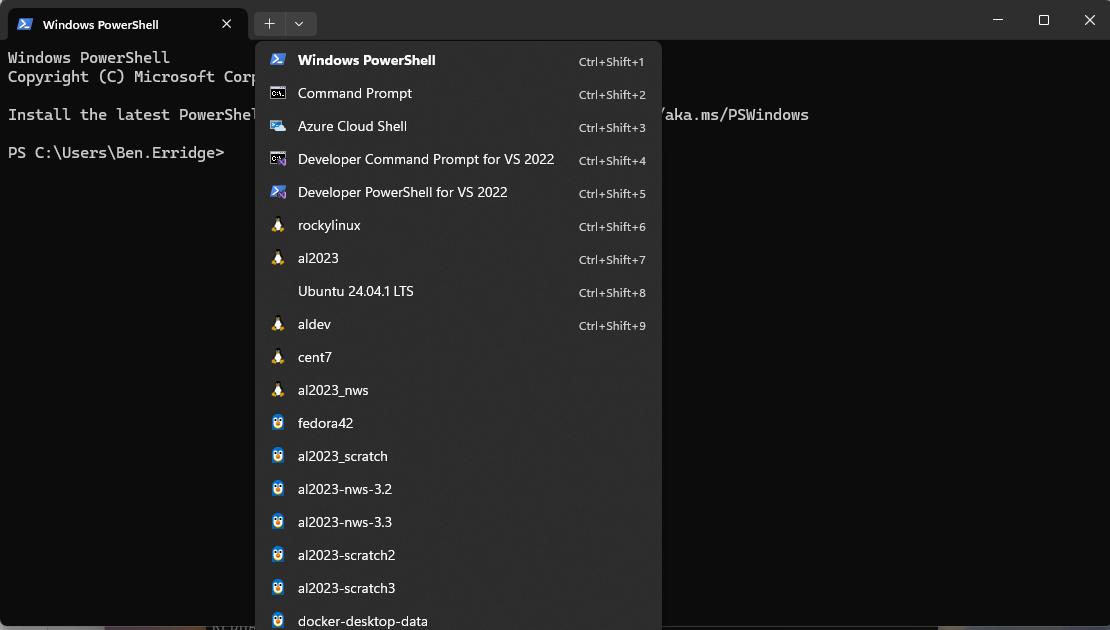
Windows Terminal: Your WSL Command Center
One of the best features of modern Windows is Windows Terminal (or the new PowerShell terminal). It provides a dropdown menu that lets you quickly switch between all your WSL distributions, PowerShell, Command Prompt, and any other shells you have installed.
Quick Access to All Your WSL Instances
The dropdown menu (accessible via the + button or Ctrl+Shift+Space) shows:
- All your WSL distributions (Ubuntu, Amazon Linux, Debian, etc.)
- PowerShell and Command Prompt
- Azure Cloud Shell (if configured)
- Any custom profiles you’ve created
This makes it incredibly easy to:
- Run multiple distributions simultaneously - Have Ubuntu running tests while you develop in Amazon Linux
- Switch contexts instantly - Jump from PowerShell to your WSL environment in one click
- Organize your workflow - Open different projects in different WSL instances
Customizing Your Terminal Profiles
You can customize each WSL profile in Windows Terminal with:
- Custom icons and colors
- Different starting directories
- Custom fonts and themes
- Keyboard shortcuts for each profile
To customize, click the dropdown arrow → Settings (or press Ctrl+,), then edit your WSL profiles. For example, you might set your Amazon Linux instance to always start in ~/dev/projects.
This integration makes WSL feel like a first-class citizen in Windows, not an add-on. You’re never more than a click away from any of your Linux environments.
Tips and Troubleshooting
Accessing Windows Files from WSL
Windows drives are mounted under /mnt/:
cd /mnt/c/Users/YourName/Documents
But remember: don’t develop here. Use this for moving files, not active work.
Accessing WSL Files from Windows
Your WSL filesystem is accessible from Windows at:
\\wsl$\al2023\home\ben\
You can browse it in File Explorer or map it as a network drive.
Create Symlinks to Windows Directories for Easier Access
Typing /mnt/c/Users/YourName/Documents every time gets old fast. I set up symlinks in my home directory that point to my Windows Documents and Downloads folders for quick access:
# Create symlinks to Windows user directories
ln -s /mnt/c/Users/ben/Documents ~/Documents
ln -s /mnt/c/Users/ben/Downloads ~/Downloads
ln -s /mnt/c/Users/ben/Desktop ~/Desktop
Now you can quickly access these directories:
# Copy a file from Windows Downloads
cp ~/Downloads/data.csv ~/dev/projects/my-project/

# Move files to Windows Documents for sharing
cp analysis-results.txt ~/Documents/

# Check what's on your Windows Desktop
ls ~/Desktop
Why this is useful:
- Faster navigation -
~/Downloadsinstead of/mnt/c/Users/ben/Downloads - Easier file transfer - Quickly grab files downloaded in Windows browsers
- Share results - Copy analysis or build artifacts to Documents for easy Windows access
- Tab completion - Your shell’s autocomplete works naturally with
~/Downloads
This bridges the gap between your WSL development environment and Windows file management without the hassle of long paths.
~/dev/projects for best performance, but use these links when you need to quickly grab or share files with Windows.
Running Windows Applications from WSL
One of the most powerful features of WSL is the ability to run Windows executables directly from your Linux command line. WSL automatically appends Windows paths to your Linux $PATH, giving you access to all your Windows applications.
Check your path in WSL:
echo $PATH
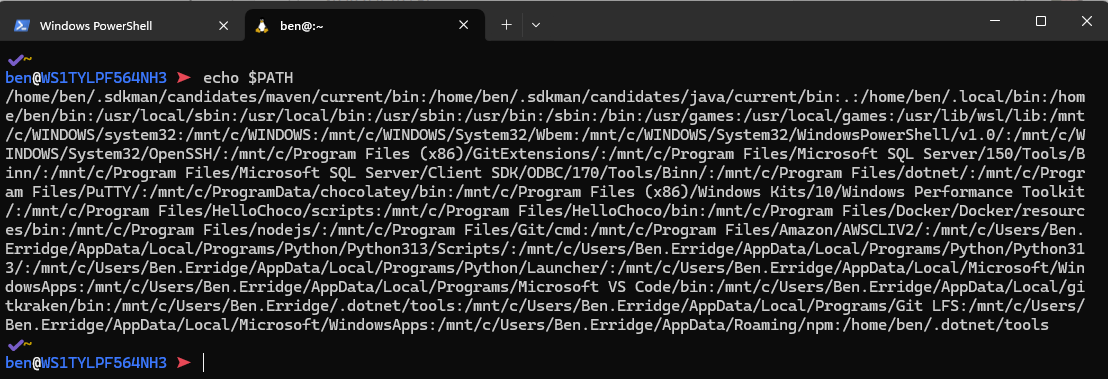
Notice the /mnt/c/Windows/System32 and other Windows directories? This means you can:
Run Windows executables from Linux:
# Open Windows Explorer from WSL
explorer.exe .

# Launch VS Code on Windows from WSL
code .

# Run PowerShell commands
powershell.exe -Command "Get-Process"

# Open files in Windows applications
notepad.exe myfile.txt

# Even run Windows GUI applications
calc.exe
Why this matters:
- Seamless integration - Mix Linux and Windows tools in the same workflow
- Best of both worlds - Use Linux CLI tools for processing, Windows GUI tools for viewing
- Bridge between systems - Pass data between Linux and Windows applications easily
For example, you might process logs with grep and awk in Linux, then open the results in Excel:
cat app.log | grep ERROR | awk '{print $1,$2,$5}' > errors.csv
explorer.exe errors.csv  # Opens in Excel
.exe extension when calling Windows executables from WSL. This helps the shell distinguish between Linux and Windows commands.
Restarting WSL Completely
If things get weird:
wsl --shutdown
wsl -d al2023
This fully restarts the WSL virtual machine.
Checking WSL Memory Usage
wsl --list --verbose
WSL 2 uses dynamic memory allocation. It’ll use what it needs and release it when done.
Running Multiple Distributions
You can have multiple WSL instances running simultaneously:
wsl -d Ubuntu
wsl -d al2023
wsl -d Debian
Each is completely isolated with its own filesystem and packages.
Why This Matters for Tools Like Claude Code
If you read our previous post about development environments, you know we mentioned that tools like Claude Code run significantly better in Linux. Here’s why WSL 2 makes this work:
- Native Linux kernel - Claude Code gets full Linux performance
- Real Unix semantics - File permissions, signals, and process management work correctly
- Better shell integration - bash, zsh, and other shells work as expected
- Faster file operations - Critical for AI tools that read/analyze codebases
- Native toolchain - gcc, make, and build tools work without translation layers
The difference is dramatic. Claude Code operations that might timeout or struggle on native Windows work flawlessly in WSL 2.
Conclusion
WSL 2 bridges the gap between Windows and Linux development without compromise. You get:
- Native Linux performance in a Windows environment
- Seamless VS Code integration for the best of both worlds
- Portable development environments that work everywhere
- Professional tooling that actually works
Whether you’re developing for cloud infrastructure, building containerized applications, or just want the Unix command line without leaving Windows, WSL 2 delivers.
Set it up once, configure it right, and you’ll never look back.
Back to the HACKS!
All the code for this blog is available on GitHub here