How I Configure My Development Environment
Every developer has their own way of organizing their workspace. Some like chaos, some crave order. Me? I’m somewhere in between; but I’ve landed on a setup that keeps me productive without getting in my way.
In this guide, I’ll walk you through a few optimizations I make to my Linux development environments. A simple ~/dev/ directory structure that makes OS migrations effortless, powerful bash aliases for instant navigation, a massive command history setup, and advanced git aliases like git in/git out and git branchup that turn complex workflows into single commands. Whether you’re setting up a fresh Linux install or optimizing your existing workflow, these configurations will save you time and reduce friction in your daily development work.
Directory Structure: Keep It Simple
My development workspace lives under ~/dev/ with two main subdirectories:
~/dev/
├── projects/    # Active development projects
└── utils/       # Utility scripts, tools, and binaries
This separation keeps things clean. Projects are where the real work happens; active repositories, experiments, client work. Utils is for everything else; helper scripts, third-party tools, standalone utilities that don’t belong in a specific project.
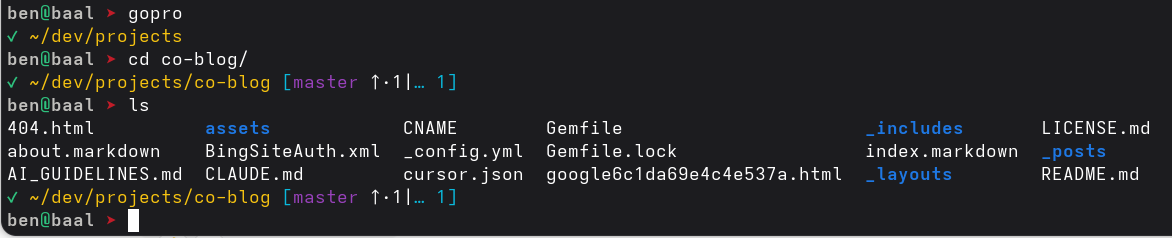
gopro that jumps straight to ~/dev/projects. Just type gopro and you're there. Simple, but it saves time every single day.
Here’s what typically lives in each:
~/dev/projects/ contains:
- Git repositories for active projects
- Experimental codebases
- Client work
- Personal projects like this blog (co-blog)
- Third-party repos I’m contributing to or learning from
~/dev/utils/ contains:
- Standalone utility binaries (like winbox64.exe for RouterOS management)
- SDK installations (Google Cloud SDK, Eclipse, IntelliJ, etc.)
- Build tools and CLI utilities
- Scripts that work across multiple projects
Why This Makes OS Migration Painless
Having everything under ~/dev/ is a game changer when switching operating systems or setting up a new machine. Instead of hunting through scattered directories (/opt/, ~/Documents/, ~/workspace/, etc.), everything development-related lives in one place.
Migrating to a new system? Simple:
# On old machine
tar -czf dev-backup.tar.gz ~/dev/

# On new machine
tar -xzf dev-backup.tar.gz -C ~/
Copy your dotfiles (.bashrc, .gitconfig), run bundle install or npm install in your projects, and you’re back up and running. No guessing where you put that utility script three months ago. No recreating directory structures from memory. Everything just works.
Bash Configuration: Power User Settings
Let’s dive into my .bashrc configuration. This file is where the magic happens; it’s loaded every time you open a terminal and sets up your environment.
.bashrc file on GitHub here.
History Settings: Never Lose a Command Again
export HISTSIZE=100000
export HISTFILESIZE=100000
export PROMT_COMMAND='history -n;history -a'
These settings give me a massive command history (100,000 commands) and ensure commands are saved immediately. I can’t count how many times I’ve needed to find that obscure command I ran three weeks ago. With this setup, it’s always there.
Essential Aliases
alias gopro='cd ~/dev/projects'
alias myip='dig +short txt ch whoami.cloudflare @1.0.0.1'
alias winbox='sudo wine /home/ben/dev/utils/winbox64.exe'
gopro: My most-used alias. Jump to projects directory instantly.
myip: Query Cloudflare’s DNS to get your public IP. No need to visit whatismyip.com.
winbox: Launch MikroTik’s WinBox for RouterOS management via Wine. Network admin life.
Git Prompt Integration
GIT_PROMPT_THEME=Solarized_UserHost
source ~/dev/projects/bash-git-prompt/gitprompt.sh
I use bash-git-prompt to show git status directly in my terminal prompt. It displays the current branch, whether you have uncommitted changes, and how many commits you’re ahead or behind. Game changer for git workflows.
Development Tool Settings
export MAVEN_OPTS="-Xmx1G -XX:MaxPermSize=512M"
export USER_MEM_ARGS="-Xmx4G"
umask 0002
These configure memory limits for Maven builds and set a sensible umask for file permissions (group-writable by default, which is handy for team environments).
SDKMAN Integration
export SDKMAN_DIR="$HOME/.sdkman"
[[ -s "$HOME/.sdkman/bin/sdkman-init.sh" ]] && source "$HOME/.sdkman/bin/sdkman-init.sh"
SDKMAN is a lifesaver for managing Java, Gradle, Maven, and other JVM-related tools. This snippet initializes it at shell startup.
Git Configuration: Aliases That Save Hours
Now for the real power user stuff. My .gitconfig file contains aliases that make git operations lightning-fast. Let’s break down each one:
.gitconfig file on GitHub here.
Basic Shortcuts
[alias]
    s = status
    co = checkout
    br = branch
    com = commit
These are straightforward time-savers. Instead of typing git status, just git s. Same for checkout, branch, and commit. Muscle memory loves these.
Remote Operations
    f = fetch --all
    r = remote -v
git f: Fetch from all remotes at once. Essential when working with multiple remote repositories or forks.
git r: Show all configured remotes with their URLs. Quick way to verify where you’re pushing and pulling from.
Advanced: Incoming and Outgoing Commits
These are my favorites:
    out = log --pretty=oneline --abbrev-commit --graph @{u}..
    in = !git fetch && git log --pretty=oneline --abbrev-commit --graph ..@{u}
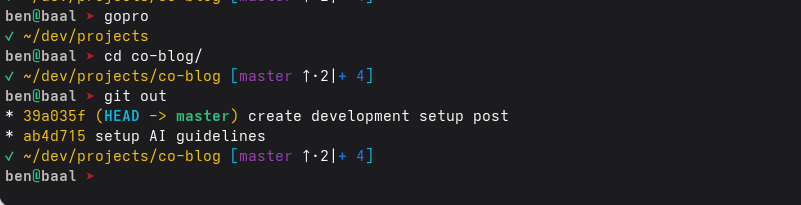
git out: Shows commits you have locally that haven’t been pushed yet. Perfect before pushing to verify what you’re about to send upstream.
git in: Fetches from remote and shows commits that exist upstream but not in your local branch. See what you’re about to pull before you pull it.
Both use --graph for a visual representation and --abbrev-commit for shorter, readable commit hashes.
Example output:
$ git out
* a3f4b21 Add feature X
* 2c8d9f3 Fix typo in docs

$ git in
* 7e9a1c4 Merge pull request #42
* 5b3f8d2 Update dependencies
Here’s what git out looks like in action:
Cherry-Pick Shortcut
cher = cherry-pick
git cher: Cherry-picking is common enough to deserve a shorter alias. Copy specific commits from one branch to another without the full merge.
Patch Application
ap = apply --ignore-space-change --ignore-whitespace
git ap: Apply patches while ignoring whitespace differences. Crucial when working with patches from different editors or coding standards.
Branch Creation and Push
branchup = "!f() { git checkout -b \"$1\" && git push -u origin \"$1\"; }; f"
git branchup feature-name: This one’s a real workflow enhancer. It creates a new branch AND pushes it to origin with upstream tracking in one command.
Usage:
git branchup feature-authentication
# Creates local branch 'feature-authentication'
# Pushes it to origin
# Sets up tracking so future pushes/pulls just work
No more “fatal: The current branch has no upstream branch” messages.
Editor and Merge Tool Configuration
[core]
    editor = emacs

[merge]
    tool = kdiff3

[diff]
    tool = kdiff3
I use Emacs as my default git editor (for commit messages and interactive rebases) and KDiff3 for resolving merge conflicts. KDiff3 provides a three-way merge view that makes conflict resolution much more manageable than trying to decipher git’s conflict markers in a text editor.
Practical Workflows
Here’s how these configurations come together in daily use:
Starting a New Feature
gopro                                    # Jump to projects directory
cd my-project                           # Enter project
git branchup feature-cool-thing         # Create and push new branch
# ... make changes ...
git s                                   # Check status
git com -m "Implement cool thing"       # Commit
git out                                 # Verify what will be pushed
git push                                # Push to remote
Syncing with Upstream
git f                                   # Fetch from all remotes
git in                                  # See what's new upstream
git pull                                # Pull the changes
Applying Patches from Email/PR
git co -b review-patch                  # Create review branch
git ap patch-file.patch                 # Apply patch ignoring whitespace
git s                                   # Verify changes
Getting Started
Want to try this setup? Here’s how:
1. Directory Structure
mkdir -p ~/dev/projects ~/dev/utils
2. Add Bash Aliases
Add these to your ~/.bashrc:
export HISTSIZE=100000
export HISTFILESIZE=100000
alias gopro='cd ~/dev/projects'
alias myip='dig +short txt ch whoami.cloudflare @1.0.0.1'
3. Configure Git Aliases
Run these commands or add them to ~/.gitconfig:
git config --global alias.s status
git config --global alias.co checkout
git config --global alias.br branch
git config --global alias.com commit
git config --global alias.f "fetch --all"
git config --global alias.r "remote -v"
git config --global alias.cher cherry-pick
git config --global alias.out "log --pretty=oneline --abbrev-commit --graph @{u}.."
git config --global alias.in "!git fetch && git log --pretty=oneline --abbrev-commit --graph ..@{u}"
git config --global alias.ap "apply --ignore-space-change --ignore-whitespace"
git config --global alias.branchup '!f() { git checkout -b "$1" && git push -u origin "$1"; }; f'
4. Optional: Install bash-git-prompt
cd ~/dev/projects
git clone https://github.com/magicmonty/bash-git-prompt.git
Add to ~/.bashrc:
GIT_PROMPT_THEME=Solarized_UserHost
source ~/dev/projects/bash-git-prompt/gitprompt.sh
Reload your shell:
source ~/.bashrc
What’s Next: Bringing This Setup to Windows
Love this Linux-based workflow but stuck on Windows? Good news; you don’t have to choose between operating systems anymore.
In our complete guide to WSL 2, we explore Windows Subsystem for Linux, which lets you run a full Linux environment directly on Windows 11. No dual boot, no virtual machines, just native Linux performance with all the Windows convenience.
With WSL, you can:
- Use this exact bash configuration and git setup on Windows
- Run Linux command-line tools alongside Windows applications
- Keep your
~/dev/directory structure and workflow intact - Switch seamlessly between PowerShell and bash
- Get significantly better performance with tools like Claude Code, which runs much faster and more reliably in a native Linux environment
Think of it as the best of both worlds; Windows for your desktop apps and gaming, Linux for your development workflow. The WSL 2 guide walks through installation, configuration, and integrating WSL with VS Code, Windows Terminal, Claude Code, and your existing Windows tools.
If you’ve been frustrated with slow builds, flaky scripts, or tool compatibility issues on Windows, WSL solves most of those problems. AI coding assistants like Claude Code particularly benefit from the native Linux environment; faster file operations, better shell integration, and native Unix tooling make the experience dramatically smoother.
Check out the full WSL 2 setup guide to see how to bring this exact development environment to Windows. It’s a game changer for developers who need both ecosystems.
Conclusion
Your development environment should work for you, not against you. This setup gives me fast navigation, powerful git shortcuts, and the visibility I need to work confidently.
The best part? It’s portable. These configurations live in dotfiles that I can deploy to any new machine in minutes. Whether I’m on my workstation, a cloud VM, or a fresh Linux install, my environment feels like home.
Try these configurations, adapt them to your workflow, and you’ll wonder how you ever lived without them.
Back to the HACKS!
All the code for this blog is available on GitHub here